
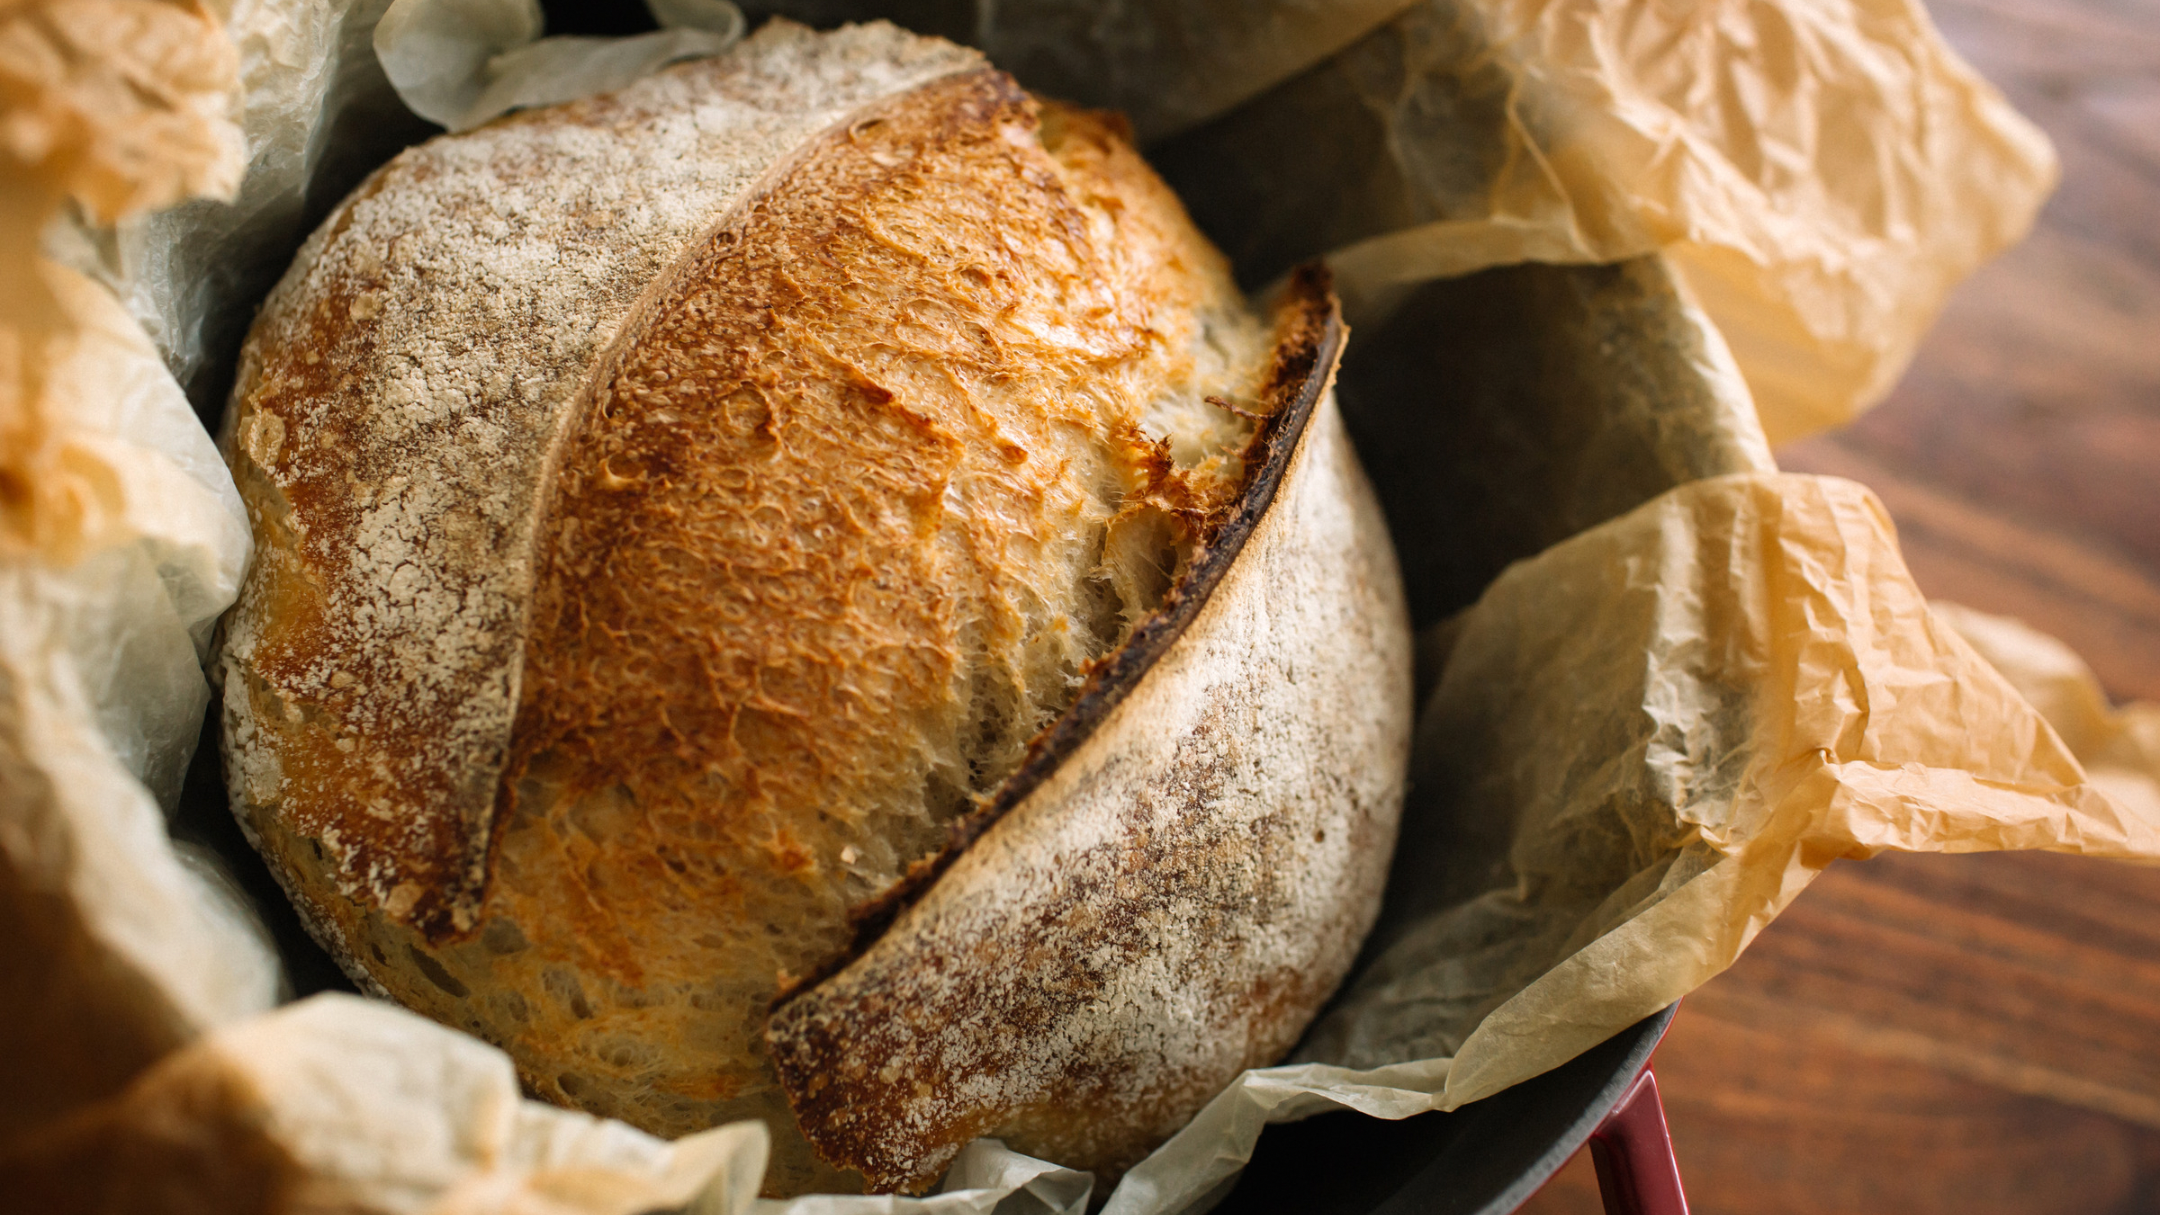
DIY Bread Kits
Step-by-step instructions on how to make your own loaf of Ditty & Dough bread at home.
Select Your Flavor
-
DITTY & DOUGH – DIY ARTISAN BREAD KIT
Just Add Water. Bake. Enjoy.
What’s Inside Your Kit
✔ Pre-measured unbleached bread flour
✔ Active dry yeast
✔ Cane sugar
✔ Fine iodized salt
(All sealed in one bag — no extra measuring needed!)Contains Wheat
What You’ll Need
1½ cups warm water (about 105–110°F — warm but not hot). Exact measurement is 280g.
Bowl + spoon or clean hands
Kitchen towel
Parchment paper
Dutch oven (recommended for best crust)
OR baking sheet if not using a Dutch oven
STEP-BY-STEP INSTRUCTIONS
1. Mix the Dough
Pour the entire contents of this kit into a large mixing bowl.
Make a small well in the center.
Add 1½ cups warm water (280g).
Mix with your hands or a spoon until sticky and shaggy — this dough is meant to look rough at this stage.
2. First Rise
Cover the bowl with a clean kitchen towel.
Let rise in a warm place for 1–2 hours, or until doubled in size.
Tip: Near a sunny window, the top of your fridge, or inside your oven with the oven OFF and the light ON works great.
3. Shape the Dough
Punch the dough down gently.
Turn it onto a lightly floured surface.
Knead for 1–2 minutes until it forms a smooth ball.
If using a banneton: lightly flour it, place dough seam-side up, cover, and rest for 30 minutes.
No banneton? Shape into a round loaf and let rest on parchment instead.
4. Preheat
Preheat your oven to 425°F.
If using a Dutch oven (recommended):
Place the Dutch oven + lid inside the oven while it preheats.
A preheated Dutch oven gives the best rise and crispy crust.
Gas vs. Electric Ovens
Electric: tends to be more even — use the middle rack.
Gas: heat can fluctuate — avoid the top rack; center works best.
5. Bake Your Loaf
Turn your dough out onto parchment paper.
Score the top with a sharp knife (one long slash or an “X”).
Carefully remove the HOT Dutch oven from the oven.
Lift the dough (with the parchment) into the Dutch oven.
Cover and bake for 25-30 minutes.
Remove lid and bake 10–15 more minutes or until golden brown.
*If you have a meat thermometer you can temp the bread. Internal temp should be 205°F
If baking without a Dutch oven:
Place shaped dough (on parchment) on a baking sheet.
Add a small oven-safe dish of water on the bottom rack to create steam.
Bake 30–35 minutes.
6. Cool & Enjoy
Let the loaf cool at least 30 minutes before slicing to keep the crumb soft and airy.
OPTIONAL: ADD-IN FLAVOR GUIDE
Add your inclusions after mixing the dough and before the first rise.
Savory Add-Ins
Roasted garlic: 1-2oz chopped garlic, roasted in olive oil and sea salt.
White cheddar: 75g shredded white cheddar cheese
Jalapeño: 25g chopped (fresh or pickled)
Sweet Add-Ins
Apple cinnamon:
75g diced apple + 1–2 teaspoons cinnamon
Tips for Add-Ins
Fold into the dough gently.
Don’t overmix — streaks and pockets of flavor are perfect.
Keep total add-ins to ½–1 cup max per loaf.
Storing Your DIY Kit
Store in a cool, dry place. Best used within 6–8 months.
Flour and yeast are shelf-stable; no refrigeration needed. -
DITTY & DOUGH – DIY ARTISAN BREAD KIT
Just Add Water. Bake. Enjoy.
What’s Inside Your Kit
✔ Pre-measured unbleached bread flour
✔ Active dry yeast
✔ Cane sugar
✔ Fine iodized salt
✔ Semi-sweet chocolate chips
✔ Espresso powder
✔ Organic unsweetened cocoa powder
(All sealed in one bag — no extra measuring needed!)Contains Wheat, Soy, Dairy
What You’ll Need
1½ cups warm water (about 105–110°F — warm but not hot). Exact measurement is 280g.
Bowl + spoon or clean hands
Kitchen towel
Parchment paper
Dutch oven (recommended for best crust)
OR baking sheet if not using a Dutch oven
STEP-BY-STEP INSTRUCTIONS
1. Mix the Dough
Pour the entire contents of this kit into a large mixing bowl.
Make a small well in the center.
Add 1½ cups warm water (280g).
Mix with your hands or a spoon until sticky and shaggy — this dough is meant to look rough at this stage.
2. First Rise
Cover the bowl with a clean kitchen towel.
Let rise in a warm place for 1–2 hours, or until doubled in size.
Tip: Near a sunny window, the top of your fridge, or inside your oven with the oven OFF and the light ON works great.
3. Shape the Dough
Punch the dough down gently.
Turn it onto a lightly floured surface.
Knead for 1–2 minutes until it forms a smooth ball.
If using a banneton: lightly flour it, place dough seam-side up, cover, and rest for 30 minutes.
No banneton? Shape into a round loaf and let rest on parchment instead.
4. Preheat
Preheat your oven to 425°F.
If using a Dutch oven (recommended):
Place the Dutch oven + lid inside the oven while it preheats.
A preheated Dutch oven gives the best rise and crispy crust.
Gas vs. Electric Ovens
Electric: tends to be more even — use the middle rack.
Gas: heat can fluctuate — avoid the top rack; center works best.
5. Bake Your Loaf
Turn your dough out onto parchment paper.
Score the top with a sharp knife (one long slash or an “X”).
Carefully remove the HOT Dutch oven from the oven.
Lift the dough (with the parchment) into the Dutch oven.
Cover and bake for 25-30 minutes.
Remove lid and bake 10–15 more minutes or until golden brown.
*If you have a meat thermometer you can temp the bread. Internal temp should be 205°F
If baking without a Dutch oven:
Place shaped dough (on parchment) on a baking sheet.
Add a small oven-safe dish of water on the bottom rack to create steam.
Bake 30–35 minutes.
6. Cool & Enjoy
Let the loaf cool at least 30 minutes before slicing to keep the crumb soft and airy.
Storing Your DIY Kit
Store in a cool, dry place. Best used within 6–8 months.
Flour and yeast are shelf-stable; no refrigeration needed. -
DITTY & DOUGH – DIY ARTISAN BREAD KIT
Just Add Water. Bake. Enjoy.
What’s Inside Your Kit
✔ Pre-measured unbleached bread flour
✔ Active dry yeast
✔ Cane sugar
✔ Fine iodized salt
✔ Dried cranberries
✔ Chopped walnuts
(All sealed in one bag — no extra measuring needed!)Contains Wheat, Walnuts
What You’ll Need
1½ cups warm water (about 105–110°F — warm but not hot). Exact measurement is 280g.
Bowl + spoon or clean hands
Kitchen towel
Parchment paper
Dutch oven (recommended for best crust)
OR baking sheet if not using a Dutch oven
STEP-BY-STEP INSTRUCTIONS
1. Mix the Dough
Pour the entire contents of this kit into a large mixing bowl.
Make a small well in the center.
Add 1½ cups warm water (280g).
Mix with your hands or a spoon until sticky and shaggy — this dough is meant to look rough at this stage.
2. First Rise
Cover the bowl with a clean kitchen towel.
Let rise in a warm place for 1–2 hours, or until doubled in size.
Tip: Near a sunny window, the top of your fridge, or inside your oven with the oven OFF and the light ON works great.
3. Shape the Dough
Punch the dough down gently.
Turn it onto a lightly floured surface.
Knead for 1–2 minutes until it forms a smooth ball.
If using a banneton: lightly flour it, place dough seam-side up, cover, and rest for 30 minutes.
No banneton? Shape into a round loaf and let rest on parchment instead.
4. Preheat
Preheat your oven to 425°F.
If using a Dutch oven (recommended):
Place the Dutch oven + lid inside the oven while it preheats.
A preheated Dutch oven gives the best rise and crispy crust.
Gas vs. Electric Ovens
Electric: tends to be more even — use the middle rack.
Gas: heat can fluctuate — avoid the top rack; center works best.
5. Bake Your Loaf
Turn your dough out onto parchment paper.
Score the top with a sharp knife (one long slash or an “X”).
Carefully remove the HOT Dutch oven from the oven.
Lift the dough (with the parchment) into the Dutch oven.
Cover and bake for 25-30 minutes.
Remove lid and bake 10–15 more minutes or until golden brown.
*If you have a meat thermometer you can temp the bread. Internal temp should be 205°F
If baking without a Dutch oven:
Place shaped dough (on parchment) on a baking sheet.
Add a small oven-safe dish of water on the bottom rack to create steam.
Bake 30–35 minutes.
6. Cool & Enjoy
Let the loaf cool at least 30 minutes before slicing to keep the crumb soft and airy.
Storing Your DIY Kit
Store in a cool, dry place. Best used within 6–8 months.
Flour and yeast are shelf-stable; no refrigeration needed. -
DITTY & DOUGH – DIY ARTISAN BREAD KIT
Just Add Water. Bake. Enjoy.
What’s Inside Your Kit
✔ Pre-measured unbleached bread flour
✔ Active dry yeast
✔ Cane sugar
✔ Fine iodized salt
✔ Sesame seeds
✔ Sea salt
✔ Dried minced garlic
✔ Dried minced onion
✔ Black sesame seeds
✔ Poppy seeds,
(All sealed in one bag — no extra measuring needed!)Contains Wheat, Sesame
What You’ll Need
1½ cups warm water (about 105–110°F — warm but not hot). Exact measurement is 280g.
Bowl + spoon or clean hands
Kitchen towel
Parchment paper
Dutch oven (recommended for best crust)
OR baking sheet if not using a Dutch oven
STEP-BY-STEP INSTRUCTIONS
1. Mix the Dough
Pour the entire contents of this kit into a large mixing bowl.
Make a small well in the center.
Add 1½ cups warm water (280g).
Mix with your hands or a spoon until sticky and shaggy — this dough is meant to look rough at this stage.
2. First Rise
Cover the bowl with a clean kitchen towel.
Let rise in a warm place for 1–2 hours, or until doubled in size.
Tip: Near a sunny window, the top of your fridge, or inside your oven with the oven OFF and the light ON works great.
3. Shape the Dough
Punch the dough down gently.
Turn it onto a lightly floured surface.
Knead for 1–2 minutes until it forms a smooth ball.
If using a banneton: lightly flour it, place dough seam-side up, cover, and rest for 30 minutes.
No banneton? Shape into a round loaf and let rest on parchment instead.
4. Preheat
Preheat your oven to 425°F.
If using a Dutch oven (recommended):
Place the Dutch oven + lid inside the oven while it preheats.
A preheated Dutch oven gives the best rise and crispy crust.
Gas vs. Electric Ovens
Electric: tends to be more even — use the middle rack.
Gas: heat can fluctuate — avoid the top rack; center works best.
5. Bake Your Loaf
Turn your dough out onto parchment paper.
Score the top with a sharp knife (one long slash or an “X”).
Carefully remove the HOT Dutch oven from the oven.
Lift the dough (with the parchment) into the Dutch oven.
Cover and bake for 25-30 minutes.
Remove lid and bake 10–15 more minutes or until golden brown.
*If you have a meat thermometer you can temp the bread. Internal temp should be 205°F
If baking without a Dutch oven:
Place shaped dough (on parchment) on a baking sheet.
Add a small oven-safe dish of water on the bottom rack to create steam.
Bake 30–35 minutes.
6. Cool & Enjoy
Let the loaf cool at least 30 minutes before slicing to keep the crumb soft and airy.
Storing Your DIY Kit
Store in a cool, dry place. Best used within 6–8 months.
Flour and yeast are shelf-stable; no refrigeration needed. -
DITTY & DOUGH – DIY ARTISAN BREAD KIT
Just Add Water. Bake. Enjoy.
What’s Inside Your Kit
✔ Pre-measured unbleached bread flour
✔ Active dry yeast
✔ Cane sugar
✔ Fine iodized salt
✔ Dried rosemary
(All sealed in one bag — no extra measuring needed!)Contains Wheat
What You’ll Need
1½ cups warm water (about 105–110°F — warm but not hot). Exact measurement is 280g.
Bowl + spoon or clean hands
Kitchen towel
Parchment paper
Dutch oven (recommended for best crust)
OR baking sheet if not using a Dutch oven
STEP-BY-STEP INSTRUCTIONS
1. Mix the Dough
Pour the entire contents of this kit into a large mixing bowl.
Make a small well in the center.
Add 1½ cups warm water (280g).
Mix with your hands or a spoon until sticky and shaggy — this dough is meant to look rough at this stage.
2. First Rise
Cover the bowl with a clean kitchen towel.
Let rise in a warm place for 1–2 hours, or until doubled in size.
Tip: Near a sunny window, the top of your fridge, or inside your oven with the oven OFF and the light ON works great.
3. Shape the Dough
Punch the dough down gently.
Turn it onto a lightly floured surface.
Knead for 1–2 minutes until it forms a smooth ball.
If using a banneton: lightly flour it, place dough seam-side up, cover, and rest for 30 minutes.
No banneton? Shape into a round loaf and let rest on parchment instead.
4. Preheat
Preheat your oven to 425°F.
If using a Dutch oven (recommended):
Place the Dutch oven + lid inside the oven while it preheats.
A preheated Dutch oven gives the best rise and crispy crust.
Gas vs. Electric Ovens
Electric: tends to be more even — use the middle rack.
Gas: heat can fluctuate — avoid the top rack; center works best.
5. Bake Your Loaf
Turn your dough out onto parchment paper.
Score the top with a sharp knife (one long slash or an “X”).
Carefully remove the HOT Dutch oven from the oven.
Lift the dough (with the parchment) into the Dutch oven.
Cover and bake for 25-30 minutes.
Remove lid and bake 10–15 more minutes or until golden brown.
*If you have a meat thermometer you can temp the bread. Internal temp should be 205°F
If baking without a Dutch oven:
Place shaped dough (on parchment) on a baking sheet.
Add a small oven-safe dish of water on the bottom rack to create steam.
Bake 30–35 minutes.
6. Cool & Enjoy
Let the loaf cool at least 30 minutes before slicing to keep the crumb soft and airy.
Storing Your DIY Kit
Store in a cool, dry place. Best used within 6–8 months.
Flour and yeast are shelf-stable; no refrigeration needed. -
DITTY & DOUGH – DIY ARTISAN BREAD KIT
Just Add Water. Bake. Enjoy.
What’s Inside Your Kit
✔ Pre-measured unbleached bread flour
✔ Active dry yeast
✔ Cane sugar
✔ Fine iodized salt
✔ Dried minced onion
✔Dried tarragon
(All sealed in one bag — no extra measuring needed!)Contains Wheat
What You’ll Need
1½ cups warm water (about 105–110°F — warm but not hot). Exact measurement is 280g.
Bowl + spoon or clean hands
Kitchen towel
Parchment paper
Dutch oven (recommended for best crust)
OR baking sheet if not using a Dutch oven
STEP-BY-STEP INSTRUCTIONS
1. Mix the Dough
Pour the entire contents of this kit into a large mixing bowl.
Make a small well in the center.
Add 1½ cups warm water (280g).
Mix with your hands or a spoon until sticky and shaggy — this dough is meant to look rough at this stage.
2. First Rise
Cover the bowl with a clean kitchen towel.
Let rise in a warm place for 1–2 hours, or until doubled in size.
Tip: Near a sunny window, the top of your fridge, or inside your oven with the oven OFF and the light ON works great.
3. Shape the Dough
Punch the dough down gently.
Turn it onto a lightly floured surface.
Knead for 1–2 minutes until it forms a smooth ball.
If using a banneton: lightly flour it, place dough seam-side up, cover, and rest for 30 minutes.
No banneton? Shape into a round loaf and let rest on parchment instead.
4. Preheat
Preheat your oven to 425°F.
If using a Dutch oven (recommended):
Place the Dutch oven + lid inside the oven while it preheats.
A preheated Dutch oven gives the best rise and crispy crust.
Gas vs. Electric Ovens
Electric: tends to be more even — use the middle rack.
Gas: heat can fluctuate — avoid the top rack; center works best.
5. Bake Your Loaf
Turn your dough out onto parchment paper.
Score the top with a sharp knife (one long slash or an “X”).
Carefully remove the HOT Dutch oven from the oven.
Lift the dough (with the parchment) into the Dutch oven.
Cover and bake for 25-30 minutes.
Remove lid and bake 10–15 more minutes or until golden brown.
*If you have a meat thermometer you can temp the bread. Internal temp should be 205°F
If baking without a Dutch oven:
Place shaped dough (on parchment) on a baking sheet.
Add a small oven-safe dish of water on the bottom rack to create steam.
Bake 30–35 minutes.
6. Cool & Enjoy
Let the loaf cool at least 30 minutes before slicing to keep the crumb soft and airy.
Storing Your DIY Kit
Store in a cool, dry place. Best used within 6–8 months.
Flour and yeast are shelf-stable; no refrigeration needed. -
DITTY & DOUGH – DIY ARTISAN BREAD KIT
Just Add Water and Honey. Bake. Enjoy.
What’s Inside Your Kit
✔ Pre-measured unbleached bread flour
✔ Active dry yeast
✔ Cane sugar
✔ Fine iodized salt
✔ Dried red pepper flakes
(All sealed in one bag — no extra measuring needed!)Contains Wheat
What You’ll Need
1½ cups warm water (about 105–110°F — warm but not hot). Exact measurement is 280g.
2½ tbsp of honey (approx. 50 grams)
Bowl + spoon or clean hands
Kitchen towel
Parchment paper
Dutch oven (recommended for best crust)
OR baking sheet if not using a Dutch oven
STEP-BY-STEP INSTRUCTIONS
1. Mix the Dough
Pour the entire contents of this kit into a large mixing bowl.
Make a small well in the center.
Mix honey into 1½ cups warm water (280g), add to dry mixture.
Mix with your hands or a spoon until sticky and shaggy — this dough is meant to look rough at this stage.
2. First Rise
Cover the bowl with a clean kitchen towel.
Let rise in a warm place for 1–2 hours, or until doubled in size.
Tip: Near a sunny window, the top of your fridge, or inside your oven with the oven OFF and the light ON works great.
3. Shape the Dough
Punch the dough down gently.
Turn it onto a lightly floured surface.
Knead for 1–2 minutes until it forms a smooth ball.
If using a banneton: lightly flour it, place dough seam-side up, cover, and rest for 30 minutes.
No banneton? Shape into a round loaf and let rest on parchment instead.
4. Preheat
Preheat your oven to 425°F.
If using a Dutch oven (recommended):
Place the Dutch oven + lid inside the oven while it preheats.
A preheated Dutch oven gives the best rise and crispy crust.
Gas vs. Electric Ovens
Electric: tends to be more even — use the middle rack.
Gas: heat can fluctuate — avoid the top rack; center works best.
5. Bake Your Loaf
Turn your dough out onto parchment paper.
Score the top with a sharp knife (one long slash or an “X”).
Carefully remove the HOT Dutch oven from the oven.
Lift the dough (with the parchment) into the Dutch oven.
Cover and bake for 25-30 minutes.
Remove lid and bake 10–15 more minutes or until golden brown.
*If you have a meat thermometer you can temp the bread. Internal temp should be 205°F
If baking without a Dutch oven:
Place shaped dough (on parchment) on a baking sheet.
Add a small oven-safe dish of water on the bottom rack to create steam.
Bake 30–35 minutes.
6. Cool & Enjoy
Let the loaf cool at least 30 minutes before slicing to keep the crumb soft and airy.
Storing Your DIY Kit
Store in a cool, dry place. Best used within 6–8 months.
Flour and yeast are shelf-stable; no refrigeration needed. -
DITTY & DOUGH – DIY ARTISAN BREAD KIT
Just Add Water and Honey. Bake. Enjoy.
What’s Inside Your Kit
✔ Pre-measured unbleached bread flour
✔ Active dry yeast
✔ Cane sugar
✔ Fine iodized salt
✔ Shelled sunflower seeds
(All sealed in one bag — no extra measuring needed!)Contains Wheat, may contain nuts and peanuts
What You’ll Need
1½ cups warm water (about 105–110°F — warm but not hot). Exact measurement is 280g.
2½ tbsp of honey (approx. 50 grams)
Bowl + spoon or clean hands
Kitchen towel
Parchment paper
Dutch oven (recommended for best crust)
OR baking sheet if not using a Dutch oven
STEP-BY-STEP INSTRUCTIONS
1. Mix the Dough
Pour the entire contents of this kit into a large mixing bowl.
Make a small well in the center.
Mix honey into 1½ cups warm water (280g), add to dry mixture.
Mix with your hands or a spoon until sticky and shaggy — this dough is meant to look rough at this stage.
2. First Rise
Cover the bowl with a clean kitchen towel.
Let rise in a warm place for 1–2 hours, or until doubled in size.
Tip: Near a sunny window, the top of your fridge, or inside your oven with the oven OFF and the light ON works great.
3. Shape the Dough
Punch the dough down gently.
Turn it onto a lightly floured surface.
Knead for 1–2 minutes until it forms a smooth ball.
If using a banneton: lightly flour it, place dough seam-side up, cover, and rest for 30 minutes.
No banneton? Shape into a round loaf and let rest on parchment instead.
4. Preheat
Preheat your oven to 425°F.
If using a Dutch oven (recommended):
Place the Dutch oven + lid inside the oven while it preheats.
A preheated Dutch oven gives the best rise and crispy crust.
Gas vs. Electric Ovens
Electric: tends to be more even — use the middle rack.
Gas: heat can fluctuate — avoid the top rack; center works best.
5. Bake Your Loaf
Turn your dough out onto parchment paper.
Score the top with a sharp knife (one long slash or an “X”).
Carefully remove the HOT Dutch oven from the oven.
Lift the dough (with the parchment) into the Dutch oven.
Cover and bake for 25-30 minutes.
Remove lid and bake 10–15 more minutes or until golden brown.
*If you have a meat thermometer you can temp the bread. Internal temp should be 205°F
If baking without a Dutch oven:
Place shaped dough (on parchment) on a baking sheet.
Add a small oven-safe dish of water on the bottom rack to create steam.
Bake 30–35 minutes.
6. Cool & Enjoy
Let the loaf cool at least 30 minutes before slicing to keep the crumb soft and airy.
Storing Your DIY Kit
Store in a cool, dry place. Best used within 6–8 months.
Flour and yeast are shelf-stable; no refrigeration needed.